This document outlines the process for connecting to Computer Science departmental servers from off campus (using Windows, macOS or Linux) for the purpose of working remotely on a LabNet-based machine and/or transferring files. If you tend to work on and/or submit your coursework locally (ie, on a computer in one of the computing labs), then parts of this document may not apply to you.
1. Working remotely on a departmental server
To issue commands on a departmental server, you must either be remotely logged into the server or using a lab PC (ie, you must have a shell/console/terminal window where you can type commands). The following assumes that you are logging in remotely.
There are several reasons to log into a departmental server, some of which may depend on the specific CS course you're taking:
- You can edit files remotely. This option is only effective if (a) you're accustomed to working with command-line-based text editors, and (b) you have a fairly fast network connection. Otherwise, it's much easier to edit the entire file locally, and then transfer it when finished.
- You can compile/test your code on different systems, to make sure it works correctly.
- You can run programs on the remote server and see the results locally. However, this only works for command-line-based programs; viewing the results of remotely-running graphical applications is beyond the scope of this document).
Instructions follow for each of the major operating systems:
Windows 10/11 (64-bit or 32-bit)
You will use a program named Putty. Download the latest "Package file", as follows:
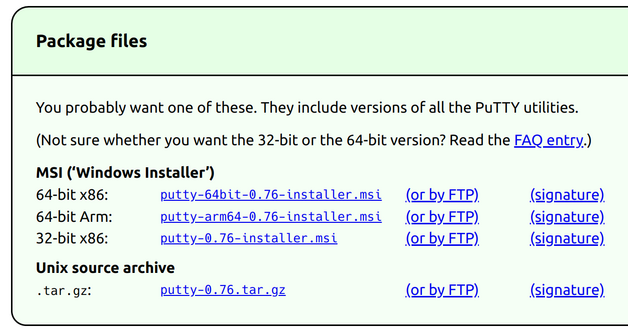
Install this package, and launch the application named 'Putty'.
You should now see the Putty login window, as follows:

Fill in the Host Name and Saved Sessions textboxes as shown above, then click the 'Save' button. This will add 'garfield' in the list of saved sessions (under 'Default Settings'). Now double-click on the 'garfield' session (or single-click and then click the 'Load' button). If a warning appears about the 'server host key', click 'Yes'. You should now see a window as follows:
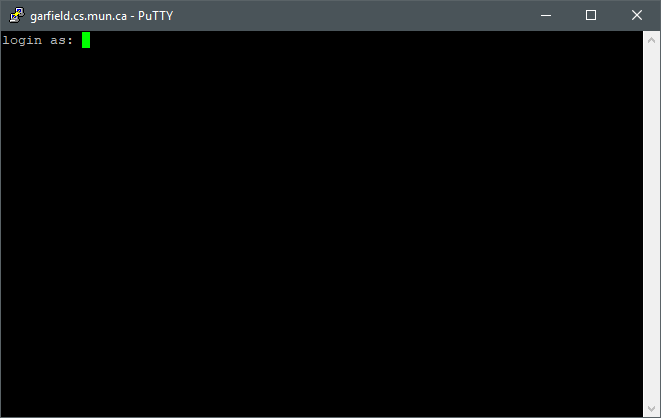
Next, you would enter your D2L username and password. From this point on, you can continue working as if you're sitting in front of a lab computer (with the restrictions noted above).
macOS (ARM and Intel)
The default terminal program for macOS is named 'Terminal', which is normally installed in your Applications/Utilities folder. Other terminal programs are also available for macOS, but only 'Terminal' will be described here.
Open a terminal window by starting the 'Terminal' program. You should now see a window as follows:
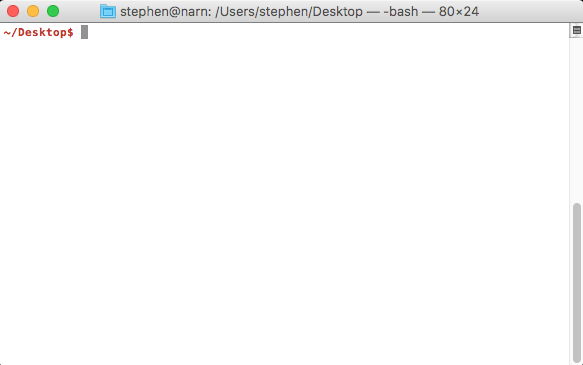
Now you need to connect to garfield by typing the following:
ssh USERNAME@garfield.cs.mun.ca
You will be prompted for your D2L password. Note that the username/password you use is for garfield.cs.mun.ca, not the username/password you use in OSX.
From this point on, you can continue working as if you're sitting in front of a lab computer (with the restrictions noted above).
Linux (all versions)
Linux will usually have a terminal program installed by default, which may be named Konsole, Terminal, xterm, etc. All of these are basically the same, and which one you choose depends on your preference.
Open a terminal window. Now you need to connect to garfield by typing the following command:
ssh USERNAME@garfield.cs.mun.ca
You will be prompted for your D2L password. Note that the username/password you use is for garfield.cs.mun.ca, not the username/password you use in Linux on your personal system.
From this point on, you can continue working as if you're sitting in front of a lab computer (with the restrictions noted above).
2. Uploading your files to a departmental server
The first step is transferring your files from your personal computer to a departmental server. Creating the files themselves may depend on having a development environment installed on your system, which is outside the scope of this document.
The following assumes that files will be uploaded over the network. If you will be using a USB drive to copy files to one of our systems (on campus), then you can skip this step.
Instructions follow for each of the major operating systems:
Windows 10/11 (64-bit or 32-bit)
You will use a program named WinSCP. Download the latest "Installation package", as follows:
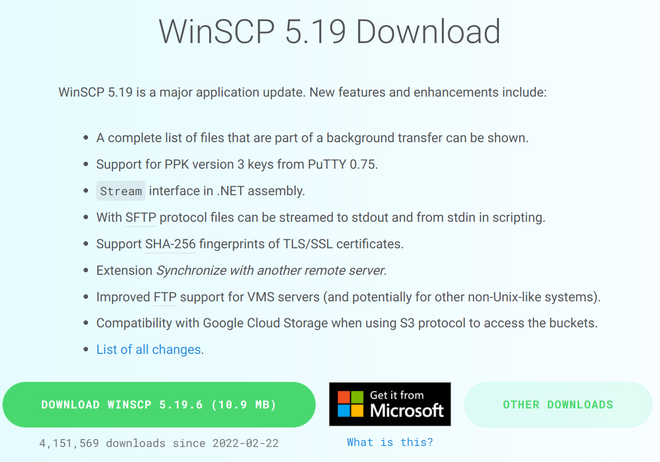
Install this package. You can leave most of the options at the defaults by clicking 'Next', but make sure to select "Commander interface" for "User interface style", as that is what the following screenshots will illustrate.
The first time you run WinSCP, it will display a window as follows:
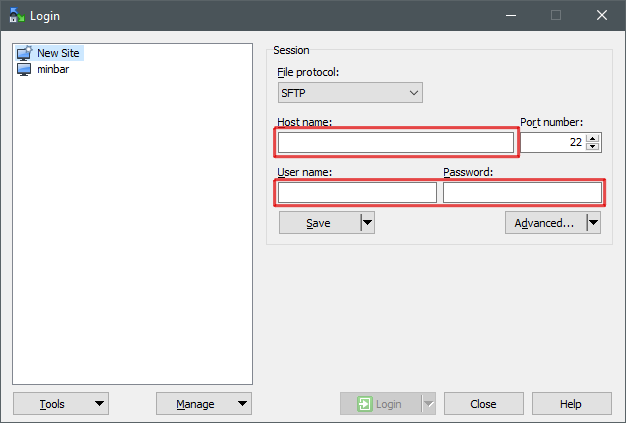
Enter the following information: Hostname => garfield.cs.mun.ca, Username/Password => the same as when you log in to one of our systems in the lab. Do not change any other setting.
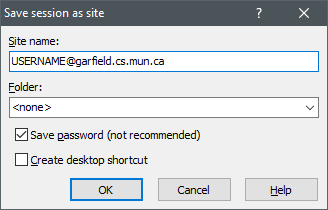
Click 'Save' to save this information, which will show a window as follows. You may also choose to save your password, so you won't have to enter it each time you start the program.
Now your session should be saved, showing a window similar to the following:
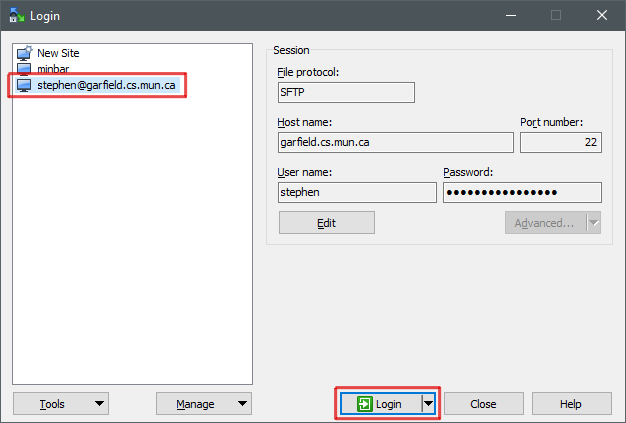
Double-click on the session (or single-click and click the 'Login' button). If a warning appears about the 'server host key', click 'Yes'. If your username and password were correct, you should now see a window similar to the following:
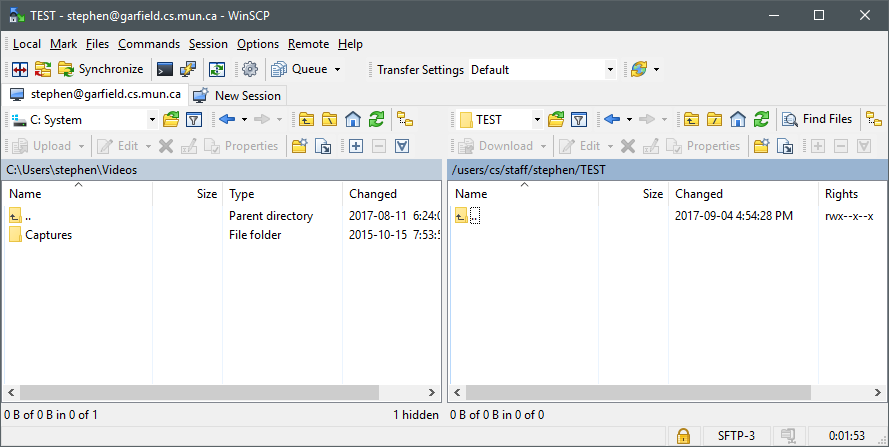
This window shows your local system to the left, and the remote system (garfield.cs.mun.ca) to the right. At this point, you change to the appropriate directories on both the local and remote sides, and simply 'drag and drop' files to copy between the two systems.
macOS 10.12 or later (Apple M1 or 64-bit Intel)
You will use a program named Cyberduck. Download the latest versions, as follows:

Install this package by unzipping it and copying to the Dock or your Applications folder.
Note: Since macOS is a UNIX-based system, you may instead prefer to use the command-line to transfer files, as detailed in the Linux section below.
The first time you run Cyberduck, it will display a window similar to the following:
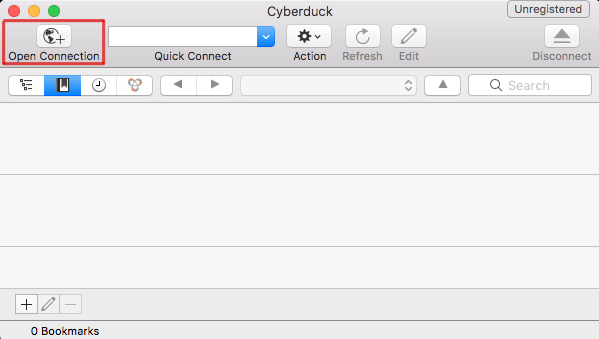
Click on "Open Connection", which will display a window as follows:
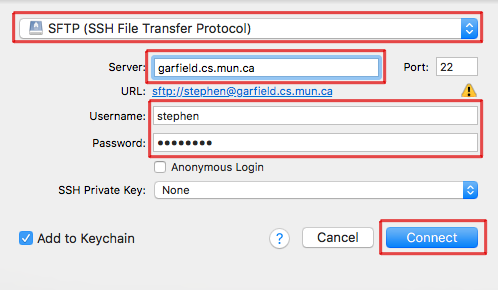
Make sure to enter the information as shown above. In particular, you must select "SFTP (SSH File Transfer Protocol)", otherwise a connection cannot be made. Enter the following information: Server => garfield.cs.mun.ca, Username/Password => your D2L username/password.
At this point you can save your login information and actually log in by clicking 'Connect'. You may see a window asking about "Unknown fingerprint". If so, click "Always" and then "Allow". If your username and server were correct, you should now see a window similar to the following:
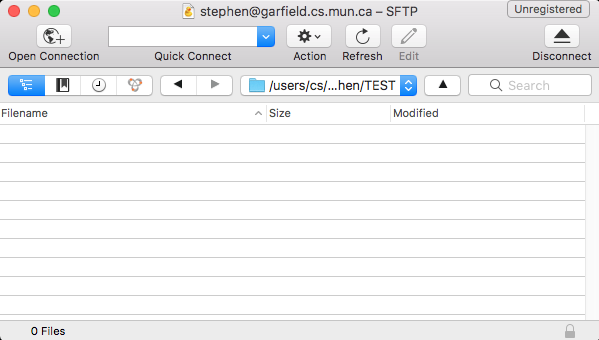
This window shows the remote filesystem (garfield.cs.mun.ca). You can then open a Finder window (which will be your local filesystem), and simply 'drag and drop' files to copy between the two systems.
Linux (all versions)
There are a wide assortment of graphical SCP/SFTP programs for Linux, usually related to the windowing system you are using (KDE, Gnome, XFCE, etc). As such, for this document only the command-line version will be described, since it is usually installed by default in every environment. If you would like more details about your specific environment, please speak to one of the lab instructors.
First, you open a shell/console/terminal window and change to the directory that contains the files you wish to upload.
Next, you issue a command in the following format:
scp LIST_OF_FILES USERNAME@garfield.cs.mun.ca:DESTINATION
You can use wildcards for 'LIST_OF_FILES'. For example, to copy all Python files to a remote folder named assign1, you would use the following command:
scp *.py USERNAME@garfield.cs.mun.ca:assign1
Or, to copy all Fortran files and a typescript file, you would use the following command:
scp *.f08 typescript USERNAME@garfield.cs.mun.ca:assign1
You will be prompted for your D2L password. Note that the username/password you use is for garfield.cs.mun.ca, not the username/password you use in Linux on your personal system.